(Re-)installing Windows

In the following guide, we will go over the steps needed to install Windows for the first time and for reinstalling an already existing installation. The images for the steps are shown in a VM, but the installation procedure is exactly the same when installing for bare-metal hardware.
Backing up old Data
The first step only applies for reinstalls and includes backing up all important existing data. It can also be applicable when switching from an old system to a new one, where you want to keep some data as well. For backup storage, possible methods are:
- External drive, like a portable HDD/SSD
- NAS connected to the home network
- Cloud storage providers
- A phone with sufficient storage and media access within Windows
The data you most likely want to back up can cover:
- Pictures, Videos and Documents
- Browser data (including bookmarks, saved passwords, browsing history)
- Game settings and save files
- Other program-specific data, like Photoshop plugins etc...
Especially for reinstalls, MAKE SURE TO GET EVERYTHING. After reinstalling, recovery of old deleted data can be very hard or near impossible. If you are unsure about a specific program's settings, don't hesitate to google how you can backup its data. Some browsers and most game launchers also have the ability to store data in their cloud. This can be an effective method for data transfer as well.
Create the Installation Medium
Next, we create the installation medium where we store the files for the Windows installer. The requirements for this are:
- USB drive with at least 8 GB of storage
- Second PC or Laptop
For the USB drive, all contents will be deleted when formatting for the installer, so it's a good idea to back those up as well if they are of importance.
If you don't have a second PC, ask a friend or family member if you can download the installer on their system. A public system, for example in a library, can also do. Administrator access is not required to create the installation medium.
Creating the installation medium on macOS can be hit or miss, the steps for doing so are also rather complicated (see below). Usage of a Windows or Linux system is preferred.
For those more technically inclined: writing the ISO to the drive via dd will not work, the installer will not boot. It has to be written via ISO-copy mode.
For creating the installation medium, these are the four main methods:
Option 1: MCT
Using the Media Creation Tool is the official method provided by Microsoft on the Windows download page. It's a small executable which does both the downloading of the installation image, as well as the flashing onto the USB drive.
After downloading and executing the program, click on the option to create a medium for another pc. Select your desired version and language, then choose the option for a USB stick and select the plugged in drive. The image will then be downloaded and written to the USB.
The Media Creation Tool can also be used to generate an ISO image. This feature is rather redundant nowadays, since you can also download the image from the website directly.
Option 2: Rufus
Rufus is a third-party tool for flashing ISO images onto USB drives. This is particularly nice when you want to create multiple installation media or already have the ISO file downloaded on your system. In practice, Rufus has also proven to be both faster and more reliable than the officially provided tool, so it might be worth a try if you have no luck with Option 1.
Another nice feature is the customization, which even includes bypassing several installation restrictions for Windows 11 (like forced use of TPM 2.0 and Secure Boot) in a user-friendly way. Ideally, you don't want to need them, but they are there just in case.
Option 3: Ventoy
The third option, Ventoy, is among my personal favorites. Again, you will need to download a Windows ISO separately. But once you do and installed Ventoy onto your USB drive, you can simply drag and drop the ISO into the Ventoy partition. And even better, you can use multiple different ISOs at the same time as well! During boot, you can then select any of the stored ISOs and boot them.
For this reason, Ventoy is often used by pc technicians for an all-purpose stick, often with diagnostic tools like MemTest86 or other Linux distros. There is also a lot of customization and extra features, including optional automatic restriction bypasses just like Rufus.
Ventoy is also the preferred way for creating Windows installation media on Linux, as it's by far the most user-friendly way.
Option 4: Manual ISO Copy
Following are the steps necessary for macOS. Since none of the tools above are available for the operating system, creating the installation medium has to be done manually. The main problem here is that one of the necessary files for installation (install.wim) is larger than 4 GiB, thus not fitting onto a FAT32 partition. In general, there are two ways to go about this:
- Splitting the
install.wim. - Putting it onto its own partition.
The first option is detailed here. The second option is a bit simpler in my opinion, so I will go over the rough steps here.
The ISO file is essentially an image containing all necessary files for booting into the installation medium. When we want to create a bootable medium from that ourself, we have to partition our USB stick accordingly, then unpack the ISO image and copy all the files onto the USB. As previously stated, the problem here is our install.wim file being larger than 4 GiB. So we create a second NTFS partition on the drive where we put this file. In general, the layout of the USB stick should look like this:
GPT formatted USB stick
├─ FAT32 partition
│  ├─ other files and folders...
│  └─ sources/
│     ├─ other files and folders...
│     └─ (no install.wim)
└─ NTFS partition
   └─ sources/
      └─ install.wim
With this, the stick should be EFI-bootable and should install Windows without problems.
Setting up the UEFI
We will first check a few settings are in the UEFI (historically and colloquially sometimes called BIOS) of your mainboard. When working within the UEFI, it's recommended to have the matching manual open for reference, either as a book or digitally on a phone or second PC/Laptop. The manual often provides even more information about specific settings and where to find them, as the builtin explanations and search functions are typically rather lacking. If your mainboard didn't come with a physical copy, you can find the digital version on the website of your mainboard's manufacturer (i.e. Asus, MSI, ...). The manual will also include on how to get into the UEFI in the first place, as different brands have different keybinds for it. The most common one, however, is by spamming Insert while booting.
The first thing we will do is make sure our UEFI is on the most up-to-date version. This is important for system stability, security and also for some features that were unavailable in previous versions. Most manufacturers have a detailed guide on the website, in the manual or as a YouTube video on how to update your UEFI firmware. The most common and reliable option is often an image file downloaded from the website. This has to be put onto a FAT32 formatted USB stick - for which we can conveniently also use our recently created installation medium - and then selected within the UEFI update option.
The settings we want to change are only mandatory for Windows 11, but are nice to have nonetheless. These include:
- Disabling CSM, sometimes also called Legacy Boot
- Enabling Secure Boot, with the selection being on Windows
- Enabling (f)TPM
Sometimes for Secure Boot, you will have to enroll the factory keys for it to work properly.
Preparing Drives
Before booting your installation medium, we want to make sure our partitions will be set-up properly. Because of the way the Windows installer works, having multiple drives can be an issue. For one, if you have multiple different drives with the same capacity in your system, those can be very hard to distinguish during setup, as drives will only show with a generic name and their capacity. Also, Windows likes to insert a recovery partition into all connected drives during installation. The problem with this is: once installed this way, Windows can refuse to boot if a drive, which was there during installation, is missing. To avoid both of these problems, disconnect (or disable it in the UEFI) every drive you don't want Windows installed on prior to installation.
Now, we are ready to plug in the installation medium and (re)boot into the UEFI. There, we will select the ESP (which should be named Windows Boot Manager) of our stick as a Boot Override. After rebooting, we will be greeted with the Windows Setup.
Installation
The installation steps are pretty self-explanatory. For important settings and other quirks, the recommended steps are shown below.
Select Language
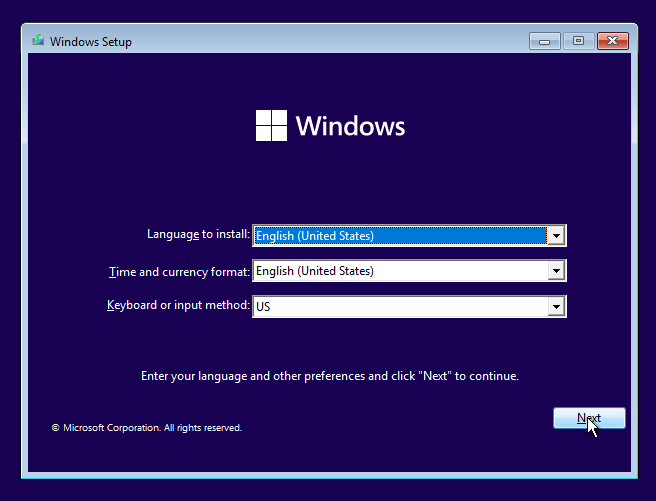
Here we can change the default language options. These are mostly necessary for the setup, as they can also be changed later within Windows itself. But choosing the preferred language now is of course recommended.
Product Key
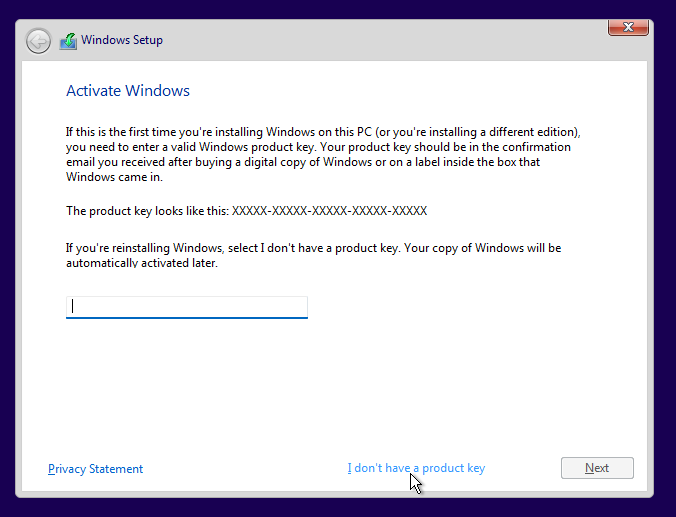
The setup will ask us for the product key of our license. This can be skipped for now. If you already had a valid license and are reinstalling, Windows will automatically activate it again when the installation is complete and has access to the internet. If your license is connected to your Microsoft account, logging into that later will also activate Windows. Digital single-PC licenses can be migrated from an old system later in the Activation Settings as well.
When buying a license, look for a CoA sticker on the box. Or for OEM versions, documentation of the license origin and transfer. This will spare you from potential legal trouble with illicit licenses.
Some sites sell keys only, without providing a license. These cheap keys often come from very shady practices and won't allow you to use Windows legally. Microsoft does not seem to care about this too much, for average consumers at least. But when they do, it can get very uncomfortable.
When going the illegal route, there is also the option of activation scripts like MAS. These will activate Windows for free, without you also having to provide payment data to third parties (which can and have been used for legal actions). Use at your own responsibility.
If possible, it is heavily recommended to get a legitimate license.
Choose Version
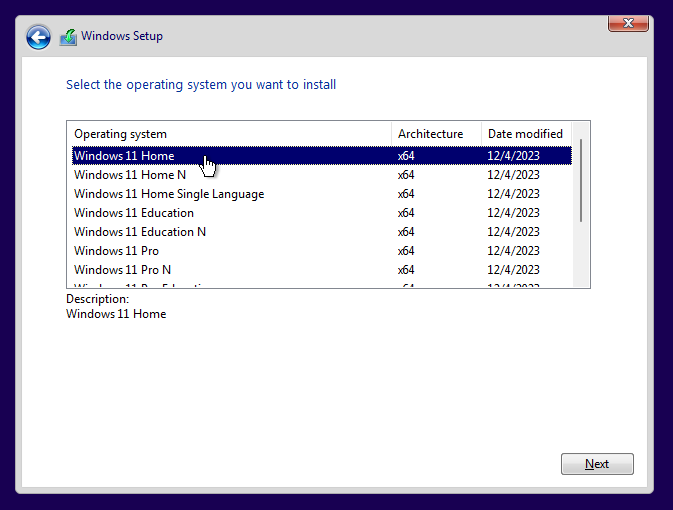
Here we choose our desired version. If you already have a license and want to use it, choose the version applicable to that.
The two notable options are Home and Pro (without any suffixes). The differences are marginal for the average consumer/gamer. If you plan on using any of these features, they will only be available with Pro:
- Hyper-V (for virtual machines running Windows)
- BitLocker (for FDE of non-OS drives)
- Remote Desktop
Some functionalities are also available on Home with free third-party software like VeraCrypt for encryption.
After choosing your version, accept the license terms and continue.
Drive Setup
After choosing a custom install, we will set up the required partitions. Or rather, let Windows set them up for us.
If the drive already had an installation of Windows on it before, it will look something like this:
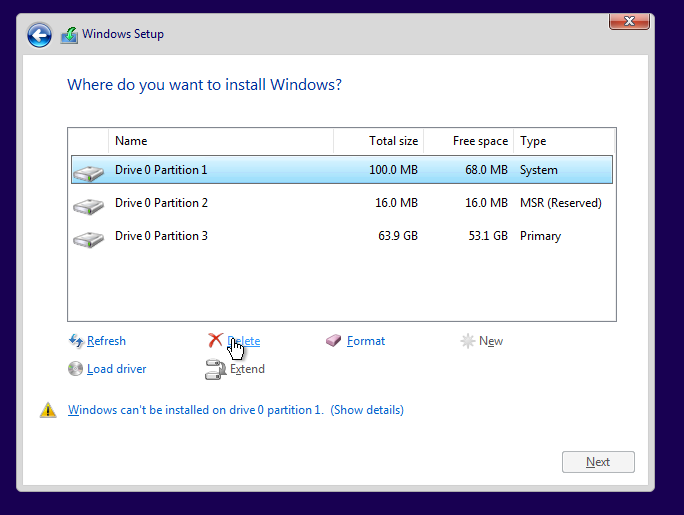
Delete every partition, now we have:
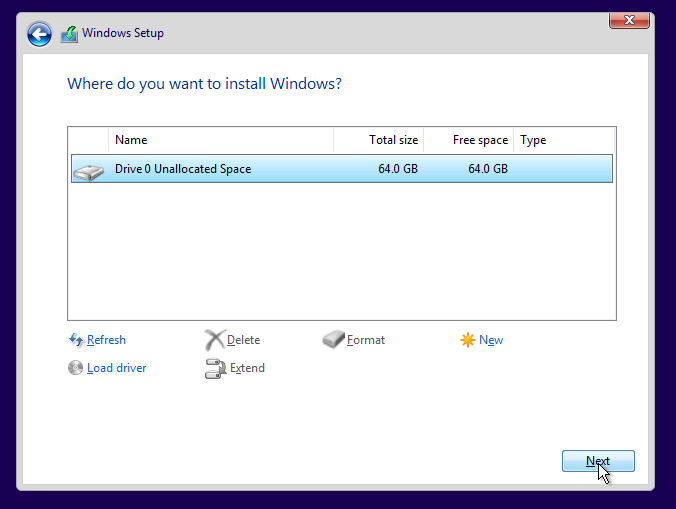
Click next while having the unallocated space selected.
The setup will then install Windows and reboot. During the restart countdown, you can remove the installation medium. If you keep your USB stick plugged in and the setup starts again after rebooting, check your boot sequence in the UEFI and change the new installation as the top entry.
First Start Setup
Go through installation, Windows will explain things along the way.

For the telemetry and optional software like OneDrive or Office, a good rule of thumb is to say no to everything. The opt-out button is sometimes really hidden.
The Setup requires an active internet connection. Sometimes, network drivers are not provided by the installation medium, making this impossible. To bypass this requirement, press Shift+F10. This will bring up a command line. Type in OOBE\BYPASSNRO (without backticks) and hit Enter. The system will now reboot and can then be installed without internet. After the installation, you can then manually get the drivers from your mainboard's website via another system with internet access. Download them onto a USB drive (the one used as an installation medium will suffice) and install them on your new system, you should be able to connect to the internet then.
The installer will ask you to log into your Microsoft account. If don't want to log in and use a local account, there is also a way to bypass this. For the E-Mail, type in a@a.com, then random letters for the password:
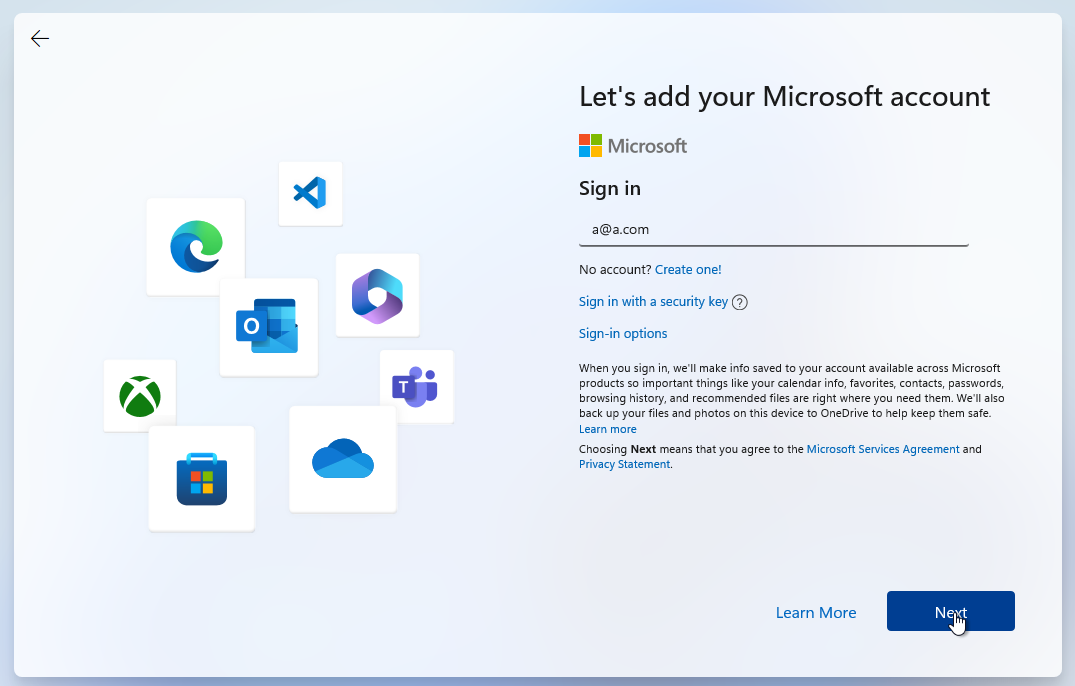
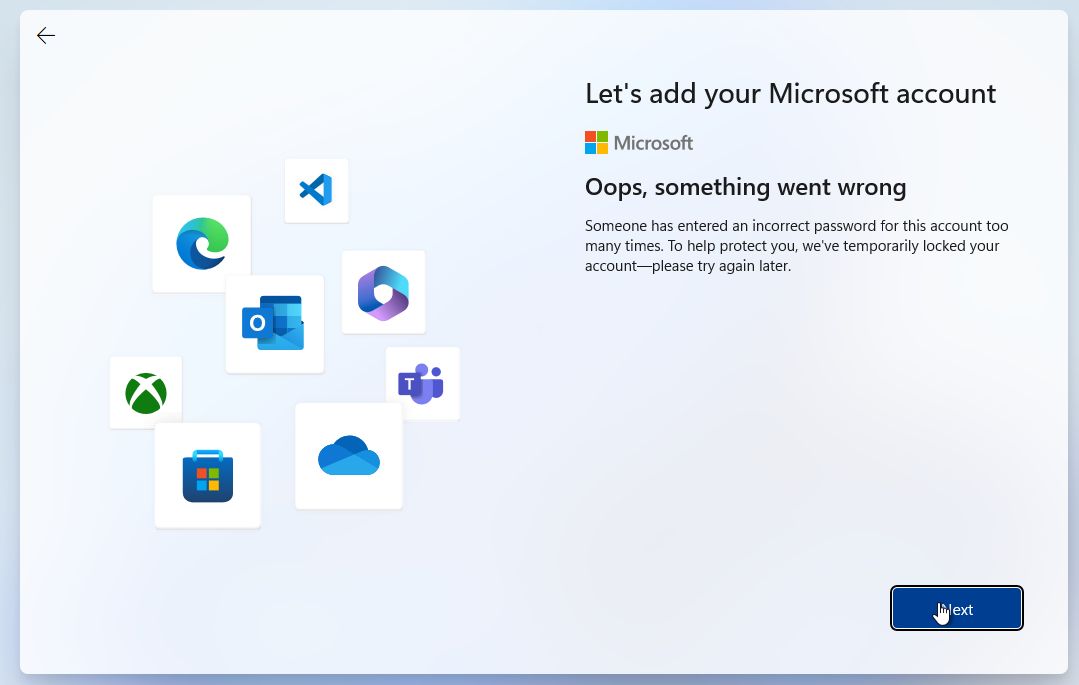
Now, after pressing next, you will be able to continue the installation without a Microsoft account.
Post Installation
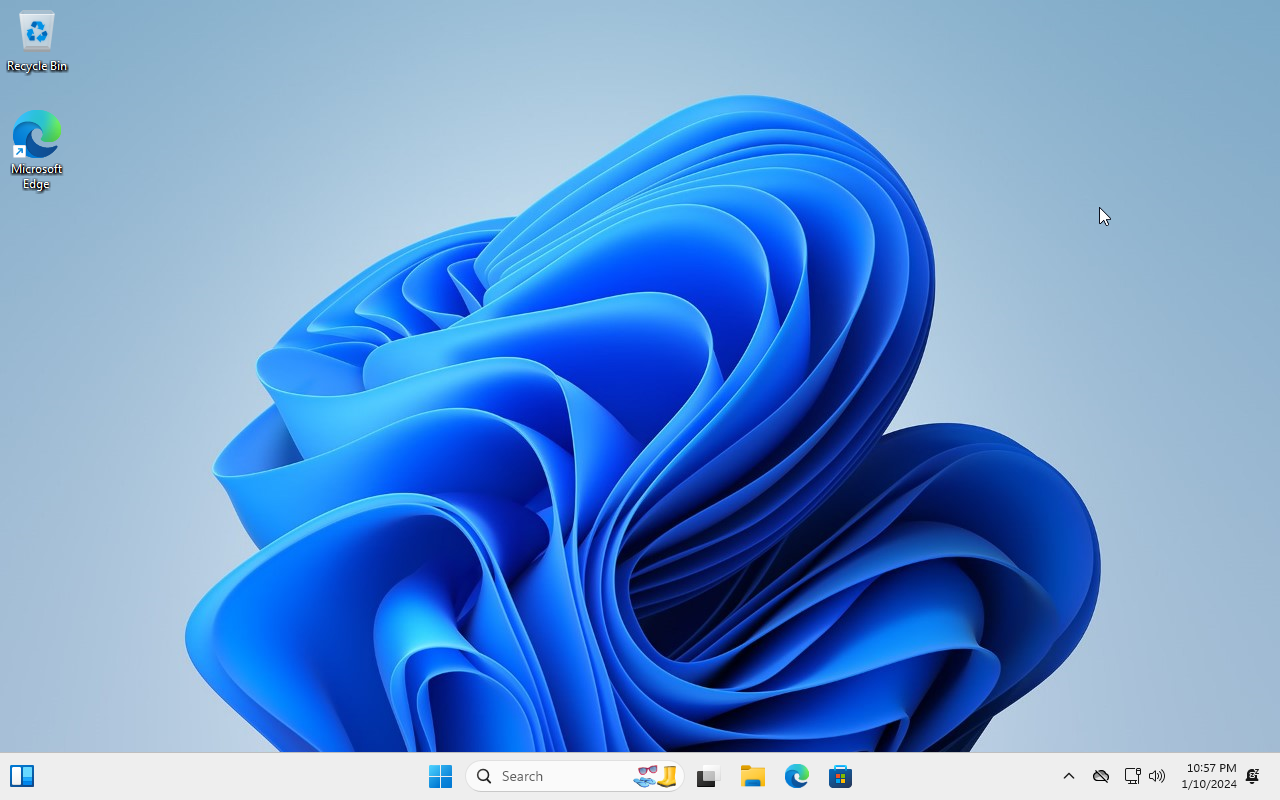
You now have a fresh installation of Windows, ready to start customizing and installing games. For optimal performance, I recommend looking at my other post. There, we will go over the optimal settings to ensure a trouble-free experience.